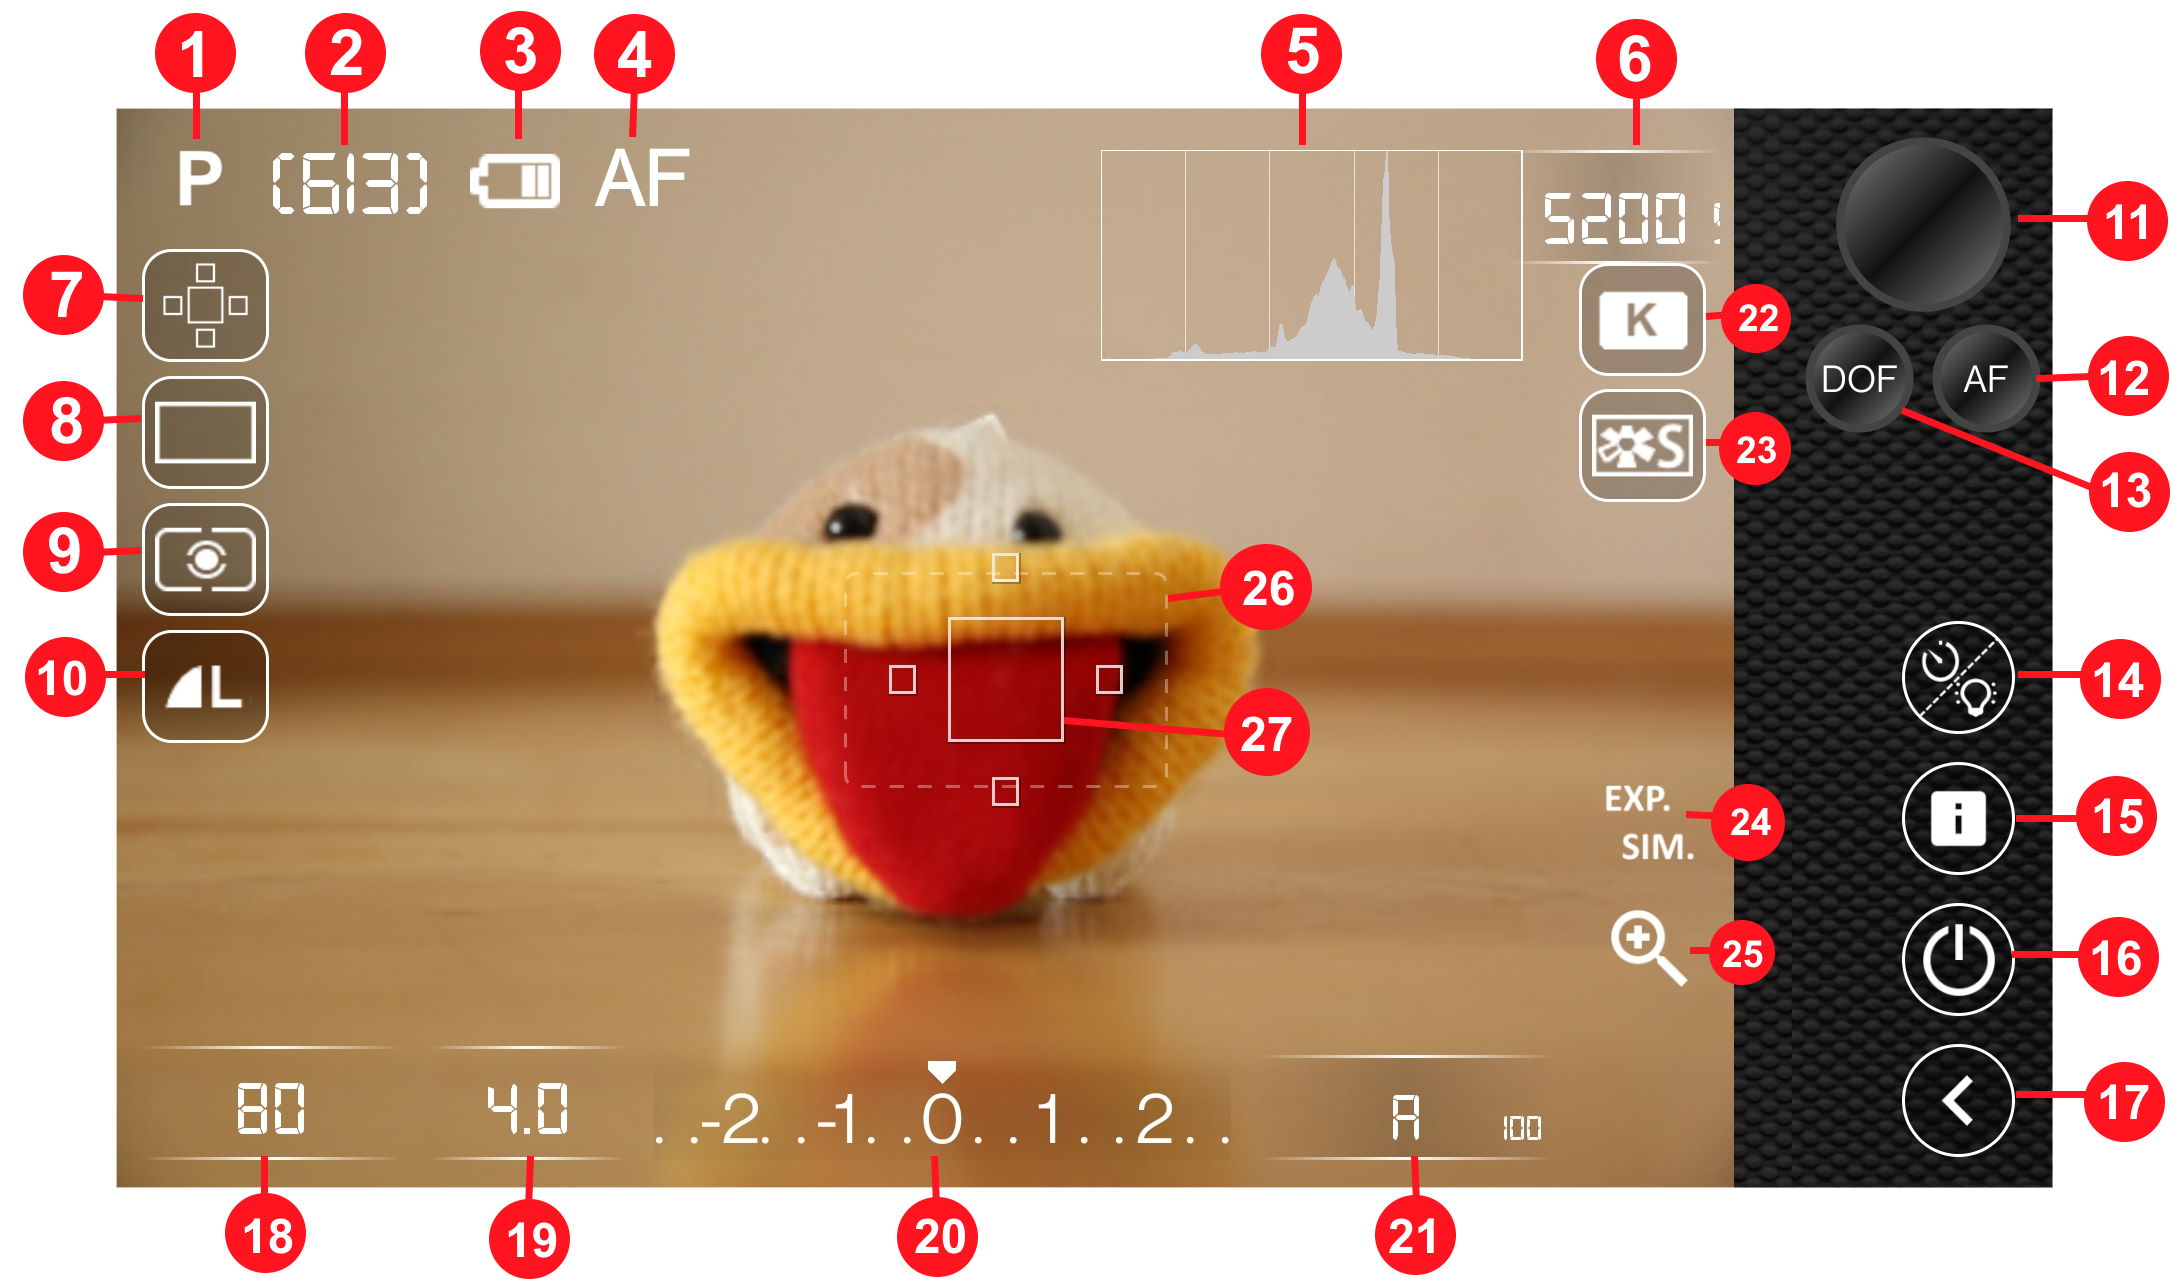
Overview
Zoomed view
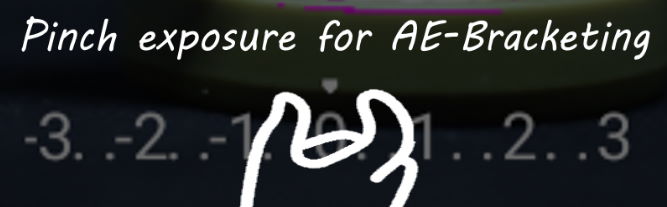
HDR bracketing
Layout, Overlays, Filters
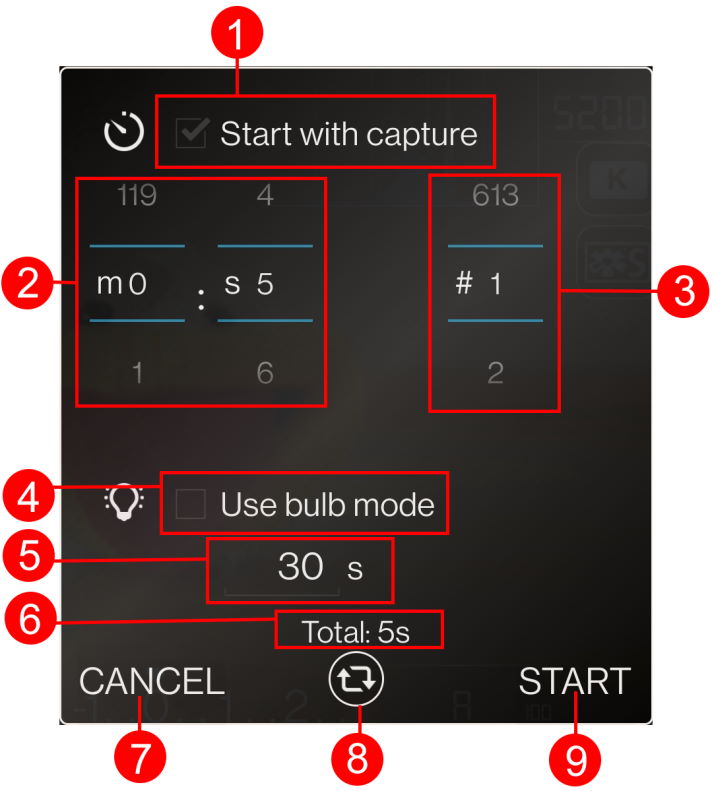
Timer bulb dialog
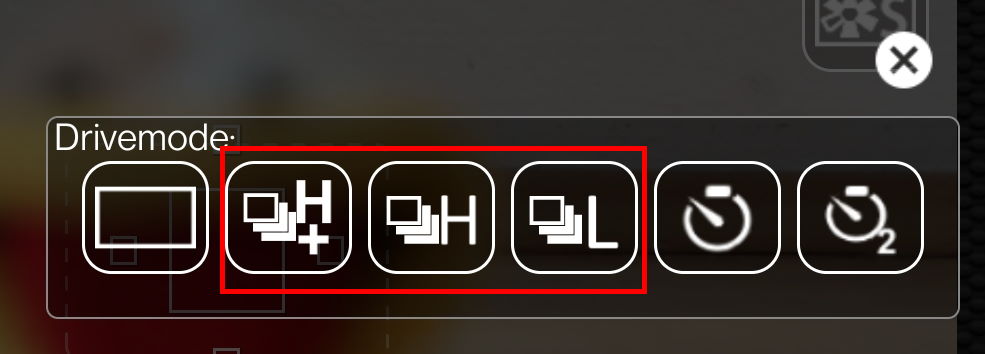
Focus bracketing (aka focus stacking)


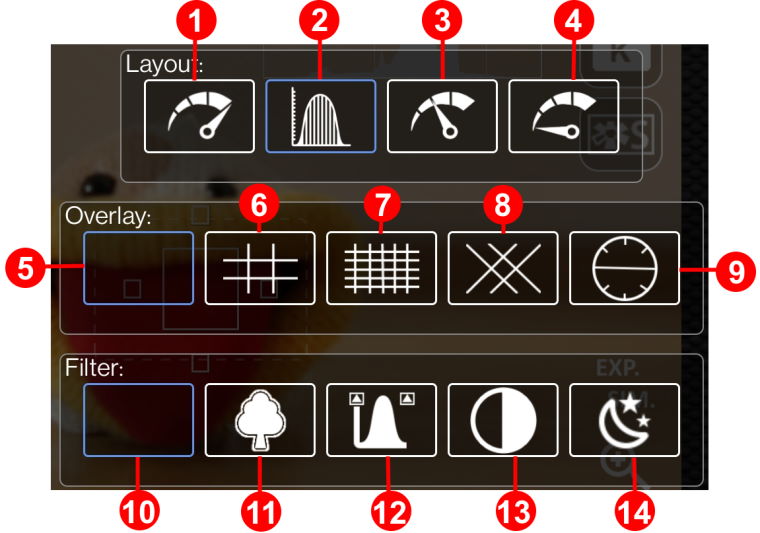

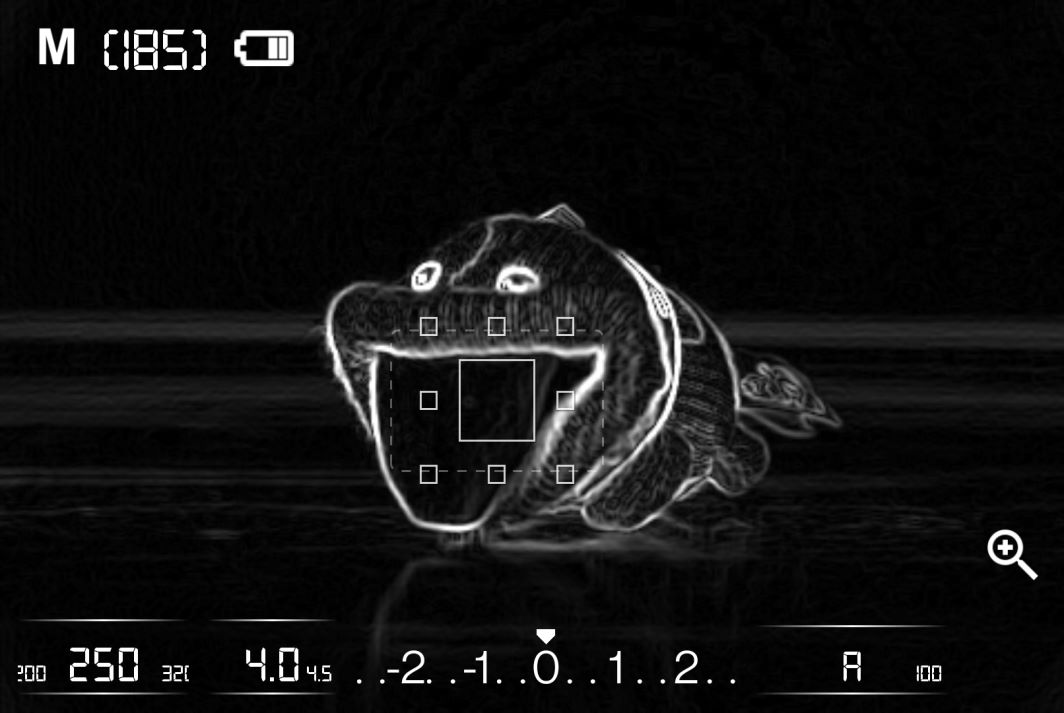
Highlight hard edges to see what's in focus.

See which areas are overexposed (magenta) or underexposed (green).
See a high contrast version of the picture.
Filter for astrophotography.
This dialog has several purposes:
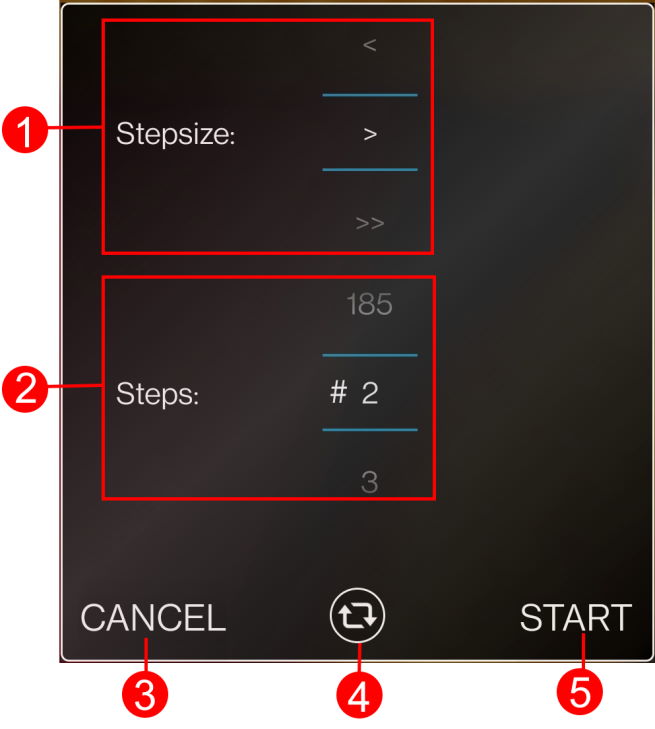
Focus bracketing allows you to make a series of captures with focus moving towards or away from camera. These captures can then be used for focus stacking.